This week we had a little ceremony to mark getting our formal Passivhaus Certification. Rob Hopkins, of the Transition Network, kindly came to handover our newly gained certificate.
We have now been in the house just over two months and we are "looking forward" to a decent winter, to give the house a bit of a test. We are probably going to want to make some adjustments to our ventilation, once we have started using it to transport the small amounts of heat around the house. More on this in a future post.
From left to right: Janet Cotterell - Passivhaus architect, me - Passivhaus energy modelling (and client), Jonathan Williams - Passivhaus builder, Joe Bellows - one of the Passivhaus contractor team, Peter Warm - Passivhaus Certifier.
Showing posts with label certification. Show all posts
Sunday, 23 October 2011
Friday, 22 July 2011
Certification airtightness test
Note: since posting this, the completed air test documents show a result of 0.2 air changes per hour.
It's been a while since I've posted during the always-longer-than-the-client-expects period where all the finishing work is completed.
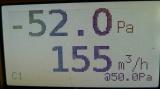
We have started the process to get Certification as a Passivhaus, using the UK's top certifier and general guru on all things building physics related, Warm Low Energy Practice. Yesterday, Paul Jennings ("doorfanman"), our airtightness consultant completed the official airtightness test and we got:
0.19 air changes per hour!
This is a really big improvement on April's test. Partly because I calculated the internal volume more accurately, using Bluebeam, which has a great tool for measuring dimensions, areas etc of PDF plans. Our internal ventilation volume is 442.38m³ and the April test had been based on a rougher calculation of 400m³. Mostly though, the information from the April test helped us to to improve the weak areas.
It will be interesting to see how durable our result is. We believe we have created an airtightness layer which lasts.
I had already put up a DIY shelf in one of the rooms before yesterday's test was conducted, which required drilling a few holes into the plaster than forms the airtightness layer in the external walls of the refurbished part of the house. I put some sealant into the holes before inserting raw-plugs. Obviously, I will be aware of the need not to drill holes in the original external walls without thinking about airtightness. In the new build section, where the airtightness layer is beneath a 50mm service void, I will not have to worry nearly as much about affecting airtightness. For this reason, in any new build, I would always want to design in a service void. I think that, in the real world, it stands a much better chance of remaining intact over the design life of the building.
Next week, our MVHR (heat recovery ventilation unit) will be commissioned. This will involve, amongst other things, calibrating the airflow to each supplied room (and from each extracted room) to:
a) ensure that there is an appropriate air change rate for the use of the room
b) ensure that sufficient heat is delivered to the rooms (the tiny trickle of heat needed in a Passivhaus is delivered via the supplied air in the ventilation system)
c) ensure that the total rate of air supplied equals the total rate of air extracted. This is important because if the two are not in balance, the MVHR wastes electrical energy and because it results in the house being slightly over or under pressure, it will increase the flow of air through the fabric of the building.
It's been a while since I've posted during the always-longer-than-the-client-expects period where all the finishing work is completed.
We have started the process to get Certification as a Passivhaus, using the UK's top certifier and general guru on all things building physics related, Warm Low Energy Practice. Yesterday, Paul Jennings ("doorfanman"), our airtightness consultant completed the official airtightness test and we got:
0.19 air changes per hour!
This is a really big improvement on April's test. Partly because I calculated the internal volume more accurately, using Bluebeam, which has a great tool for measuring dimensions, areas etc of PDF plans. Our internal ventilation volume is 442.38m³ and the April test had been based on a rougher calculation of 400m³. Mostly though, the information from the April test helped us to to improve the weak areas.
It will be interesting to see how durable our result is. We believe we have created an airtightness layer which lasts.
I had already put up a DIY shelf in one of the rooms before yesterday's test was conducted, which required drilling a few holes into the plaster than forms the airtightness layer in the external walls of the refurbished part of the house. I put some sealant into the holes before inserting raw-plugs. Obviously, I will be aware of the need not to drill holes in the original external walls without thinking about airtightness. In the new build section, where the airtightness layer is beneath a 50mm service void, I will not have to worry nearly as much about affecting airtightness. For this reason, in any new build, I would always want to design in a service void. I think that, in the real world, it stands a much better chance of remaining intact over the design life of the building.
Next week, our MVHR (heat recovery ventilation unit) will be commissioned. This will involve, amongst other things, calibrating the airflow to each supplied room (and from each extracted room) to:
a) ensure that there is an appropriate air change rate for the use of the room
b) ensure that sufficient heat is delivered to the rooms (the tiny trickle of heat needed in a Passivhaus is delivered via the supplied air in the ventilation system)
c) ensure that the total rate of air supplied equals the total rate of air extracted. This is important because if the two are not in balance, the MVHR wastes electrical energy and because it results in the house being slightly over or under pressure, it will increase the flow of air through the fabric of the building.
Wednesday, 6 April 2011
0.4 air changes per hour!!
Our airtightness test went really well yesterday. The team achieved a fantastic result of just around 0.4 a.c.h., probably a bit lower, based on an internal ventilation volume of 400m3 - all the more impressive as this is the first build of this type they had worked on, and because more than half of the build is retrofitting the original structure.
We should be able to improve on that figure in the final test needed for Certification, as we were able to identify the relative weak points.
We spent a little time today working out how much extra time we spent into doing tasks that were necessary to achieve it. Our conclusion was that it was not a significant extra task. However, everyone in our team are really committed to paying attention to protecting the airtightness layer. We have not had to have a formal "Airtightness Champion" trying to watch everyone constantly, in case it was damaged.
Watch a clip of the airtightness test on YouTube: http://www.youtube.com/watch?v=nMTLfj4iXec
We should be able to improve on that figure in the final test needed for Certification, as we were able to identify the relative weak points.
We spent a little time today working out how much extra time we spent into doing tasks that were necessary to achieve it. Our conclusion was that it was not a significant extra task. However, everyone in our team are really committed to paying attention to protecting the airtightness layer. We have not had to have a formal "Airtightness Champion" trying to watch everyone constantly, in case it was damaged.
Watch a clip of the airtightness test on YouTube: http://www.youtube.com/watch?v=nMTLfj4iXec
Thursday, 14 October 2010
What shape of building works best
At this year's AECB conference two weeks ago, Peter Warm gave an informative talk on the Passivhaus certification process. One of his PowerPoint slides showed the impact of a building's form on the wall U-values needed to get to the 15kWh/m2.a target.
By dividing the total "heat loss" area by the "treated floor area", you get a ratio which describes how compact the building form is. The "heat loss" in most cases is, essentially, the sum of the areas of the building footprint (ground floor), roof and external walls; all measurements taken externally. The "treated floor area" or TFA is the usable internal floor area; calculated according to the convention used in Germany (as you would expect, given that the Passivhaus standard originates there). The higher the form factor ratio, the lower the U-values need to be to reach the target.
Non-compact detached houses, particularly bungalows, score the worst, sometimes with a ratio as high as 5. They need walls with a very low U-value of around 0.05 to get to the 15kWh target. Blocks of flats typically have a ratio of 2 and they only need wall U-values of around 0.15 to reach the Passivhaus target.
Semi-detached and terraces are somewhere in-between.
This means that, if you want to build a Passivhaus with reasonably sensibly sized walls (i.e. less than 500mm thick) or using natural materials or at a sensible cost, you really are going to have to pay attention to the shape of your thermal envelope; the building itself can be any shape you want but the "warm" space (contained by the thermal envelope) needs to be compact.
In our project, our form factor ratio is 2.53 - so I'm feeling quite pleased with myself, even though this was partly by luck.
In Passivhaus refurbs I think that building form is as least as important as orientation and solar gain, if not more so.
By dividing the total "heat loss" area by the "treated floor area", you get a ratio which describes how compact the building form is. The "heat loss" in most cases is, essentially, the sum of the areas of the building footprint (ground floor), roof and external walls; all measurements taken externally. The "treated floor area" or TFA is the usable internal floor area; calculated according to the convention used in Germany (as you would expect, given that the Passivhaus standard originates there). The higher the form factor ratio, the lower the U-values need to be to reach the target.
Non-compact detached houses, particularly bungalows, score the worst, sometimes with a ratio as high as 5. They need walls with a very low U-value of around 0.05 to get to the 15kWh target. Blocks of flats typically have a ratio of 2 and they only need wall U-values of around 0.15 to reach the Passivhaus target.
Semi-detached and terraces are somewhere in-between.
| Form factor ratio | Typical wall U-value |
| 4 < 5 | 0.05 |
| 3 < 4 | 0.10 |
| 2 < 3 | 0.15 |
This means that, if you want to build a Passivhaus with reasonably sensibly sized walls (i.e. less than 500mm thick) or using natural materials or at a sensible cost, you really are going to have to pay attention to the shape of your thermal envelope; the building itself can be any shape you want but the "warm" space (contained by the thermal envelope) needs to be compact.
In our project, our form factor ratio is 2.53 - so I'm feeling quite pleased with myself, even though this was partly by luck.
In Passivhaus refurbs I think that building form is as least as important as orientation and solar gain, if not more so.
Friday, 24 September 2010
New Passivhaus Refurb Standard announced
The Passivhaus Institute is finally to announce a long trailed standard for refurbishments. This new standard, to be known as EnerPHit, will be easier to achieve. The headline targets are:
25kWh/m2.a - annual heat demand
1.0 - air changes per hour - airtightness standard
There'll be more detail on what assumptions lie behind these standards in the coming weeks I hope. Refurbishments to near Passivhaus standard will now be recognised with this new standard. The less stringent standard will make Passivhaus thinking and methodology more accessible to those refurbishing by giving them a challenging but achievable standard to aim for. I imagine that the procedure to gain EnerPHit certification will be similar to that for the full Passivhaus standard. Certification adds value by enforcing a certain discipline to the design and build process. This benefit will now to open to the refurb sector.
We will still be sticking with the full Passivhaus standard for our refurb. Being based in the south west of England has made it feasible to aim for. If our project had been located in Manchester, the colder climate there would make the full Passivhaus standard unrealistic practically and financially for us. The new EnerPHit standard would be within reach though.
Before we all relax too much, a quick comparison with other UK building standards reminds us that this new PH refurb standard is still far ahead of others; it will still be a huge challenge to get EnerPHit certification.
25kWh/m2.a - annual heat demand
1.0 - air changes per hour - airtightness standard
There'll be more detail on what assumptions lie behind these standards in the coming weeks I hope. Refurbishments to near Passivhaus standard will now be recognised with this new standard. The less stringent standard will make Passivhaus thinking and methodology more accessible to those refurbishing by giving them a challenging but achievable standard to aim for. I imagine that the procedure to gain EnerPHit certification will be similar to that for the full Passivhaus standard. Certification adds value by enforcing a certain discipline to the design and build process. This benefit will now to open to the refurb sector.
We will still be sticking with the full Passivhaus standard for our refurb. Being based in the south west of England has made it feasible to aim for. If our project had been located in Manchester, the colder climate there would make the full Passivhaus standard unrealistic practically and financially for us. The new EnerPHit standard would be within reach though.
Before we all relax too much, a quick comparison with other UK building standards reminds us that this new PH refurb standard is still far ahead of others; it will still be a huge challenge to get EnerPHit certification.
Sunday, 14 March 2010
A lot has happened since the last post. I have been working on the Passive House Planning Package (PHPP), the very sophisticated Excel based spreadsheet used to model how your proposed building will perform. I had spent a lot of time getting to grips with the basics of entering our proposed building's parameters - areas, materials, glazing, window frames; together with the climate and any shading - which is a bit tedious but which has to be done accurately if you want the PHPP to predict how the real life building will perform. It was only when I started getting initial estimates of how the building would consume, especially whether we were going to make it down to the magic 15kWh/m2/annum, that the power and usefulness of the PHPP really became apparent.
Since then, I have been refining the information going into the PHPP and it has allowed us to pinpoint the problem areas and tweak the design further to optimise performance. The floor is still our biggest obstacle. It definitely does not not make sense to remove the slab, as this would also mean removing all the internal supporting walls, all of which we would otherwise want to keep. My earlier modelling of the floor-wall junction may have been too optimistic, as I had only assumed a temperature of zero outside, when -10C would be a more realistic worst case. Also, the outside walls will likely perform better, as they will have insulation outside, right down to the footings. The inside walls won't have this insulation and are therefore probably a bigger thermal bridge.
We have added south facing glazing in the roof, following a visit to Ecobuild earlier in the month. Velux now do a triple glazed window with an overall U-value of 0.82. The window has an integrated external blind (essential in a south facing roof window) with remote controlled operation - even though I am not keen on excessive complexity and gadgetry built into the fabric of the house, when the window is 4m or 5m up, I'm willing to make an exception. I had wanted to avoid using roof windows, as I think it is very hard to avoid thermal bridging around the frame. How a window is installed makes a huge difference to its performance. Even with good double glazing, the way it is installed can boost or degrade its rated performance a lot. In a Passivhaus, as well as avoiding thermal bridging, the window has to be fitted to create an air-tight seal around the frame and set in the wall so that the wall reveals and overhang do not create additional shadowing on the window. In a standard block or brick built house, this means wrapping the external insulation around the window frame on the outside so that the window frames will look quite slim from the outside. Also, the rough opening, into which the window is to be installed, needs to be plastered accurately and smoothly, and let to dry out fully, before the window is installed. This allows the specialist tapes, used to make the building airtight, to be fixed between the window frame and the plasterwork to form a good air-tight seal. This changed sequencing of work is quite different to conventional builds but is essential in a Passivhaus. These tapes should be used around the frame, even when air-tight bands are placed between the frame and rough opening. Such bands are designed to expand once in place, so making a good seal but the tape provides a second layer of airtightness and it is easier to patch it if the building fails it's airtightness testing during the build (more of this later).
Visiting Ecobuild, it was possible to compare triple glazed windows. Many only have a single rubber gasket to maintain the airtight seal between the opening section and the frame. Although it may perform adequately when the Passivhaus is first commissioned, it is likely to fail over time. Better designs have double or treble gaskets and use engineered wood, which does not warp nearly as easily as its non-engineered counterpart.
On airtightness testing, we will need to test at two points during the build: after the windows go in but before the 'first fix' and again after first fix. This is essential because there is not much point in identifying any failures in the building's airtightness after it is all finished. It is much easier and cheaper to resolve problems before all the finished surfaces and fittings are put in.
On a wider note, new passive houses are between to get formal certification from the Passivhaus Institute. One of the latest was a house in Kent featured on Grand Designs. Congratulations to them! We will kick off the process for getting certification after we have got through planning.
We want to get our planning application off this week. In a conventional build, we could have sent our application off some time ago but in a Passivhaus this is much more risky as we had to do a lot more detailed design work, aided by the PHPP, to get the building working right first, before we could apply for planning permission. Otherwise we might have found ourselves unable to change something that is crucial to the building's energy performance. This might be a real barrier for some people, as it means spending more on architect's fees while the project is still not certain to go ahead.
Subscribe to:
Posts (Atom)